
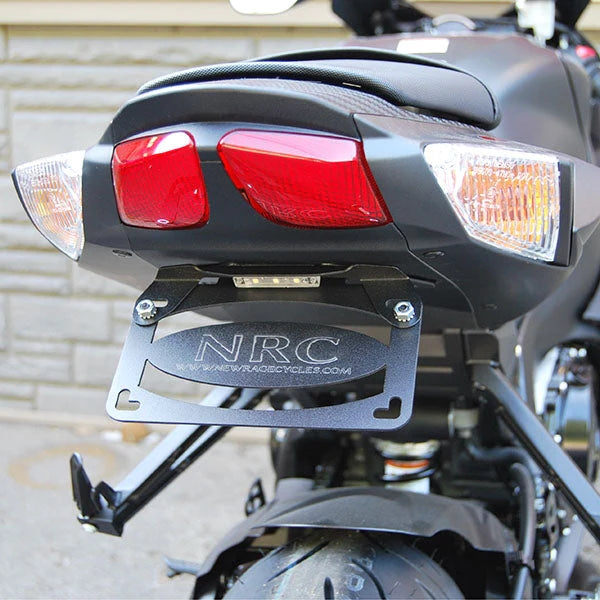
Suzuki GSXR 600/750 Tail Tidy Instructions
Suzuki GSXR 600/750 Tail Tidy Installation Instructions
1) Pop both side panels off (picture 1)
2) Remove seat bolts with 5mm allen key or socket (picture 2)
3) Remove phillips head screw and (4) push pins to remove side panel (pictures 3/4/5)
4) Find white plate light connector and unplug (picture 6)
5) With a 10mm socket, unbolt (4) bolts and remove stock fender (picture 7)
If installing standard mount:
1) With provided 1/4” spacers and M6x25 bolts, thread into lower holes but leave loose (pictures 8/9)
2) Take remaining (4) spacers and (2) bolts and thread into upper holes using 2 spacers below the bracket and 2 above (picture 10)
3) Run plate light wire through hole on tail tidy and up underneath seat and plug into OEM connector (picture 11)
If installing tucked mount:
1) With provided 1/4” spacers and M6x25 bolts thread into lower holes but leave loose (pictures 8/9)
2) Take remaining (2) spacers and (2) bolts and thread into upper holes sandwiching license plate bracket and tail tidy bracket (picture 12)
3) Tighten all (4) bolts
4) Turn key on and test light
5) Reinstall side pods and seat
Shop The Part
New Rage Cycles
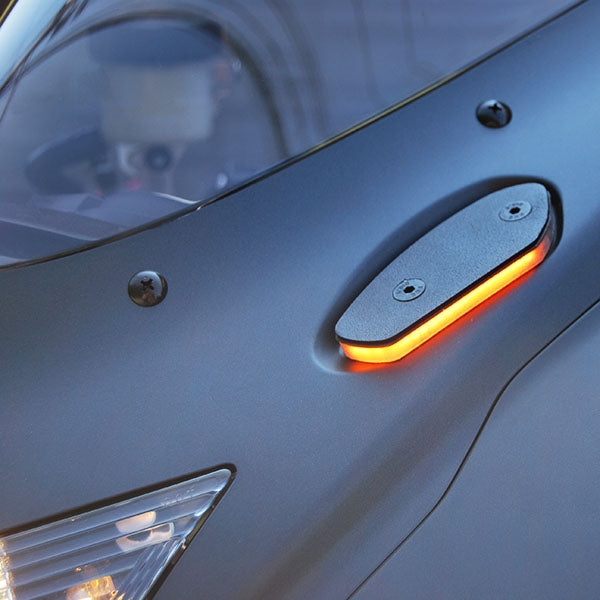
Suzuki GSXR 600/750/1000 Mirror Block Off Turn Signals (2006 - 2016/17)
Looking to remove your stock mirrors? NRC now offers PLUG & PLAY mirror block off LED turn signals for the GSXR 600, 750, and 1000 models. These fit the model years listed below:
GSX-R600 (2006-2017)
GSX-R750 (2006-2017)
GSX-R1000 (2005-2016)
These signals mount flush to the same location the mirrors were, providing a sleek looking replacement.
Save time on the install and more time riding with our line of plug & play accessories.